Build complex toys and simple tools

Shooting in "Medium" - DMC-FZ18 - The right exposure

<< Previous  Oct 4, 2007  Next >>
Hobbitt in the pool - by Tony Karp
Hobbitt in the pool
Panasonic DMC-FZ18, 504mm equivalent, 1/200 sec @ F5.6, ISO 100. No post processing or cropping. The default exposure metering in the DMC-FZ18 works very well, even in tricky situations like this.
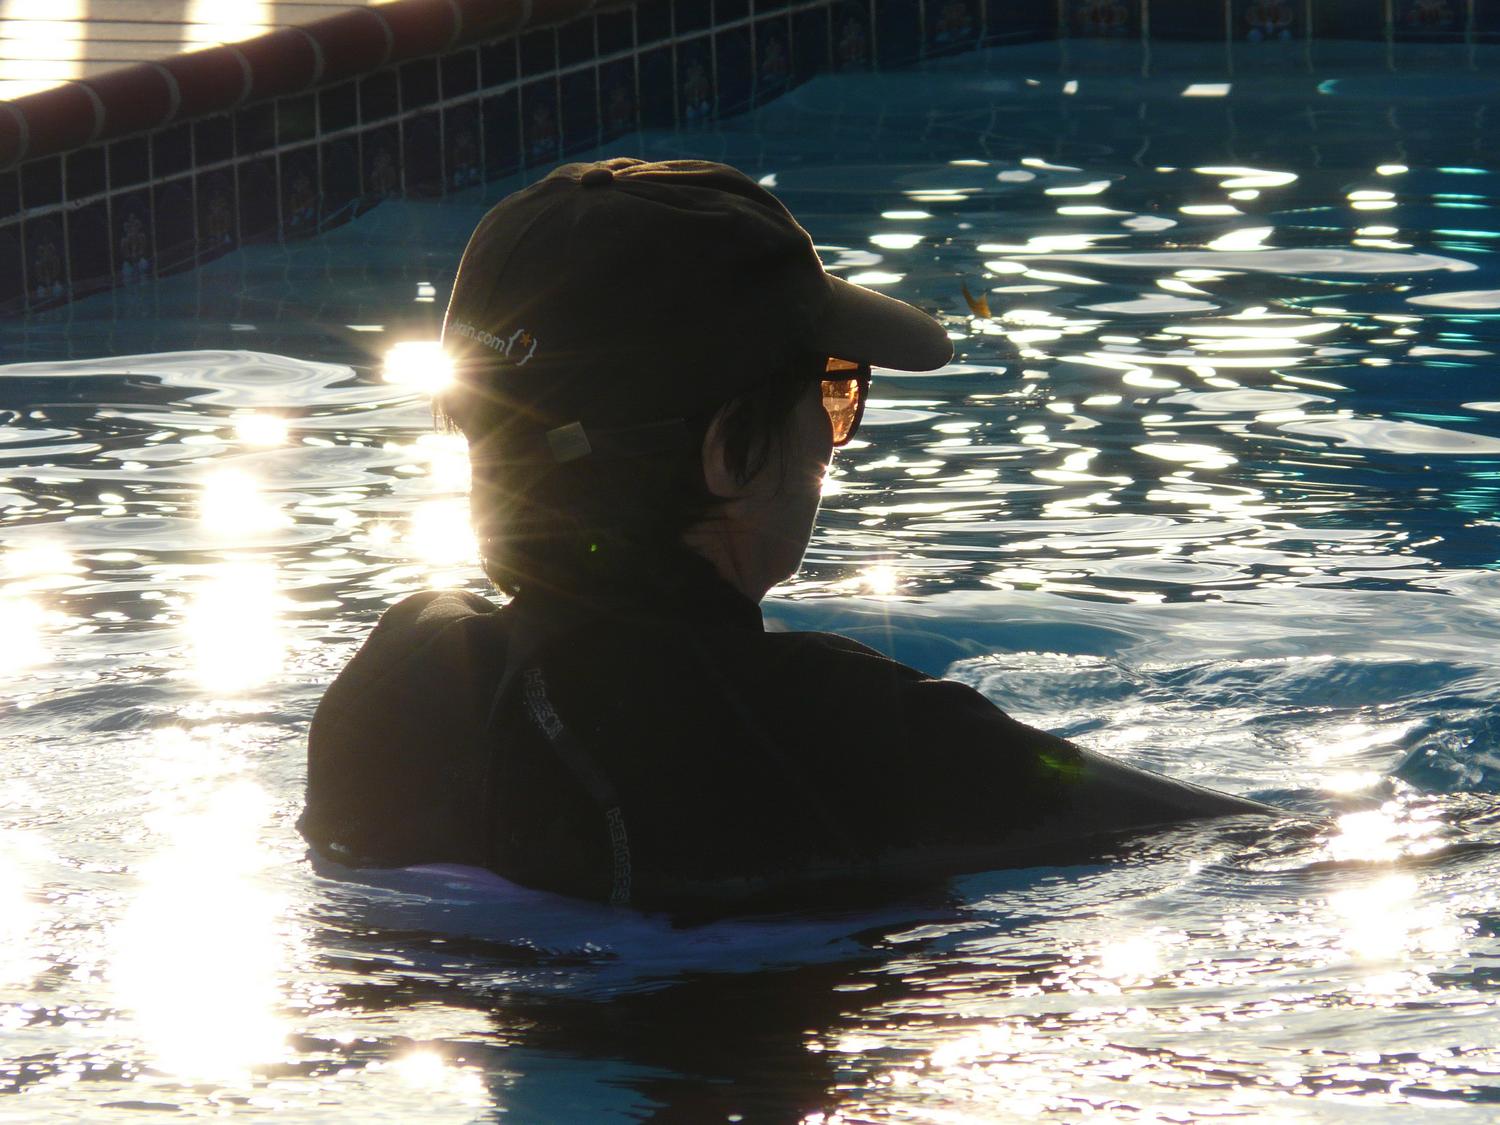
This is a continuation of the series about shooting in "Medium.," a term I made up for shooting in JPEG format, but still getting many of the advantages of shooting in Raw format. This episode is about getting the right exposure.

Every once in a while, someone will post a set of images on one of the online forums with a tale of how they saved the day by saving their files in Raw format. Usually, it concerns a shot that is terribly underexposed but, since the file was saved in Raw format, they were able to fix it. "Thank goodness I was shooting in Raw. This shot would have been lost in JPEG."

Let's start by talking about getting the right exposure in general when working with digital cameras. Exposure metering, sensor technology, and in-camera processing get better with each new generation of cameras. For most shots, I use the default metering, which examines the whole picture and makes a fairly accurate guess. In most situations, this works pretty well, as can be seen in the picture above.

But there are situations like the one in the shot below that require a little thought before pressing the shutter release. In this scene, the range of light values between the indoors and the outdoors appears too wide for the camera to handle. What to do in a case like this?

One way is to take several shots at different exposures and assemble them later, using the correctly exposed part from each picture. This requires a tripod and some special software. Another way would by to set up some strobe lights in the darker areas and trigger them from the camera's built-in flash. Not very practical.

But if you're just taking a quick shot and want to get the widest range of values in your picture, start by following this rule:
"Expose for the highlights, post process for the shadows. You can always pull some detail out of the shadows, but a blown highlight is forever."
Let's see how this works in the photograph below.
Before - by Tony Karp
Before
Panasonic DMC-FZ18, 28mm equivalent, 1/100 sec @F3.2, ISO 100. Inside the garage, looking towards the pool. Exposing for the interior of the garage would have burned out the outdoor part of the scene. It couldn't be recovered. Exposing for the outdoor part leaves the garage in deep shadow. Do we have to shoot in Raw to save this picture? Maybe not.
After - by Tony Karp
After
The above image after a quick trip through LightZone 3. Even though the original image was saved in JPEG format, there was still a lot of detail that could be pulled out of the shadows with some quick post processing. Here, I used LightZone's "Relight" tool to open up the shadows. This will give you an idea of what sort information is lurking in the shadows of the darker areas of an ordinary JPEG file. Maybe you don't need to use Raw after all..
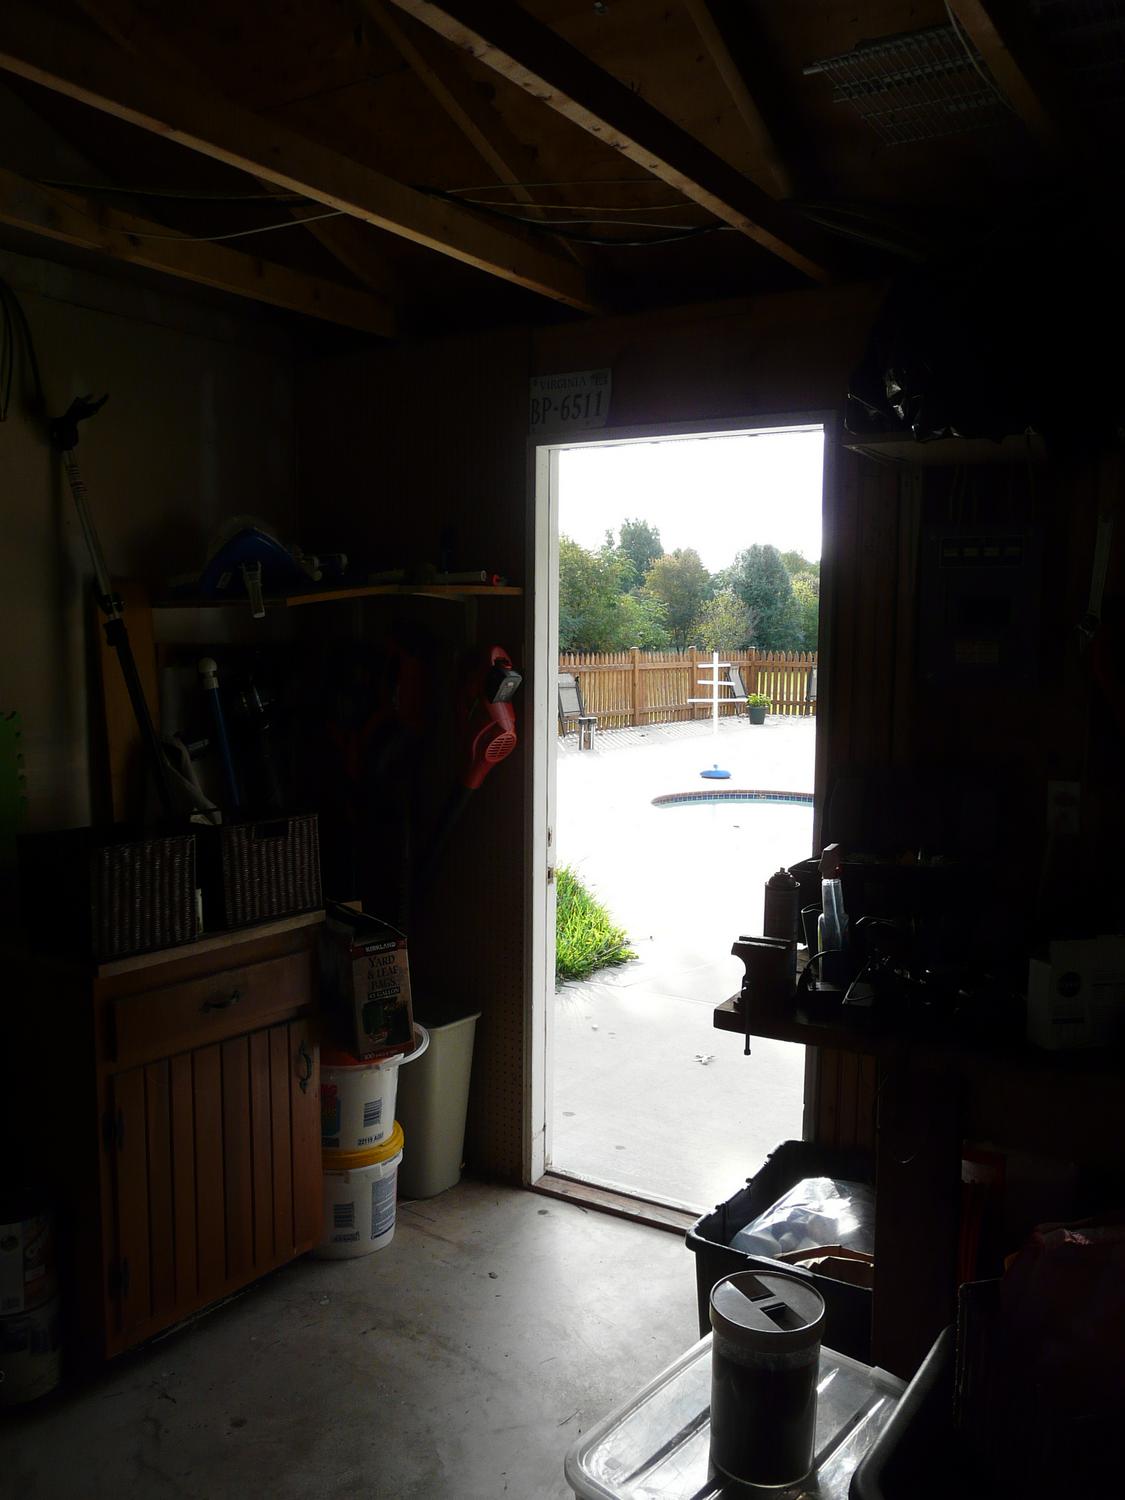
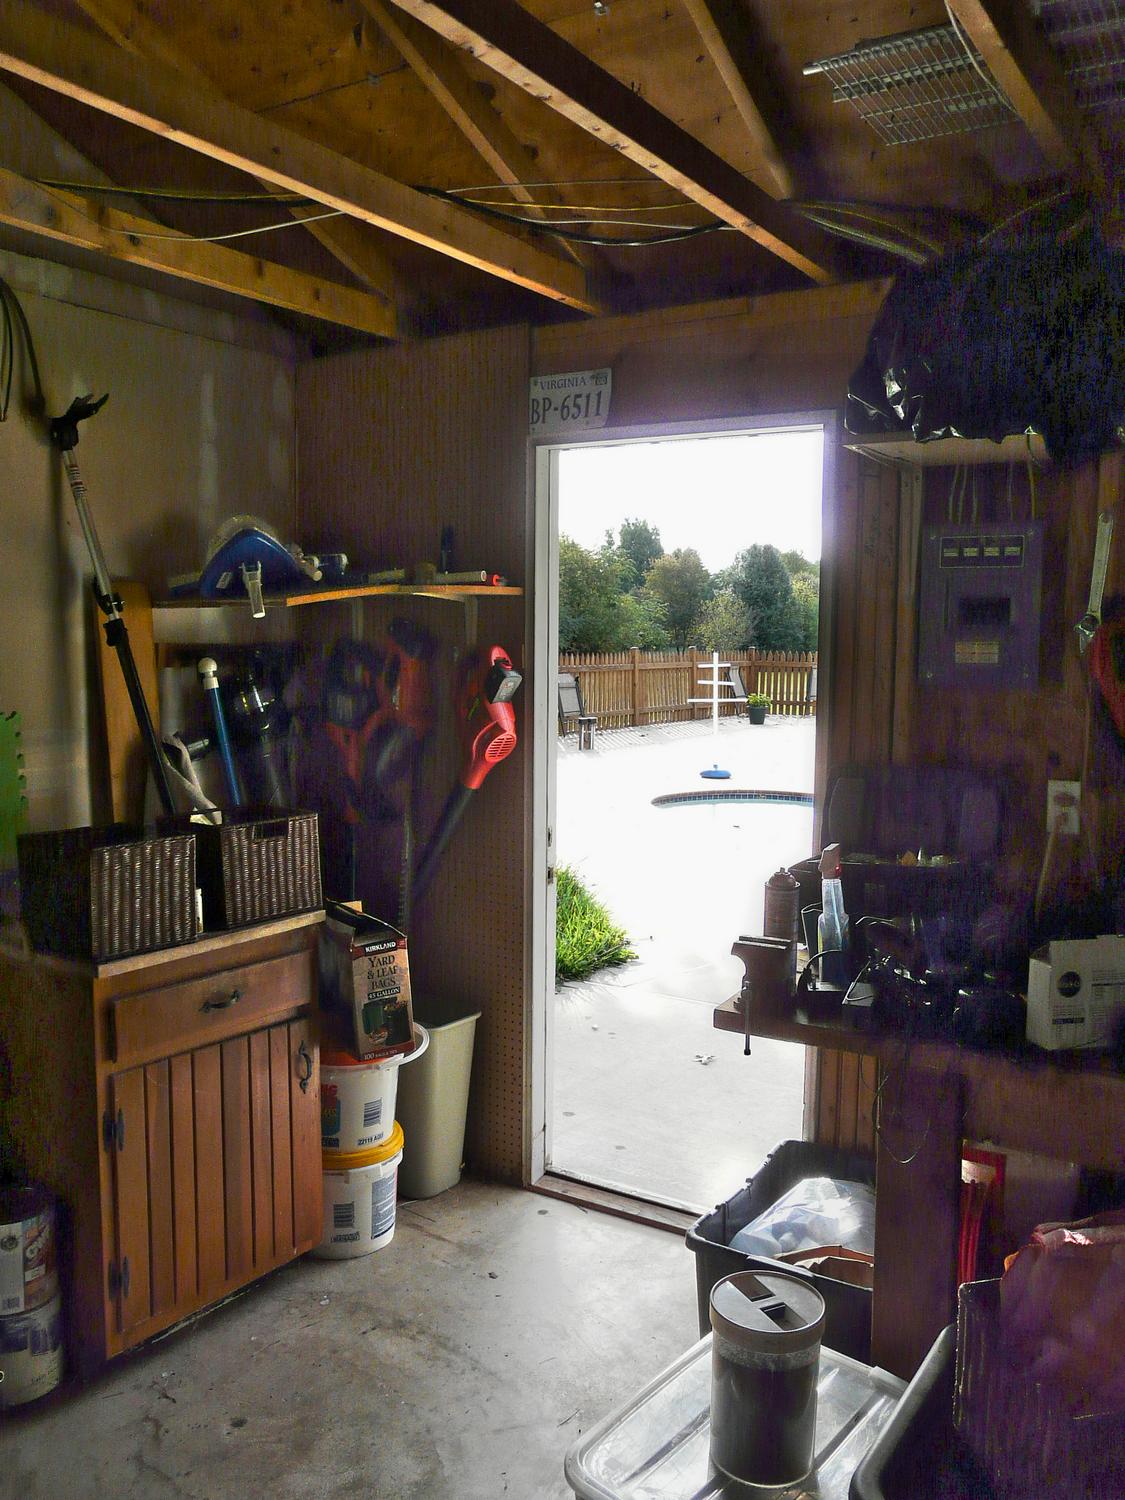
The first step in getting the right exposure is to learn to correlate what you see in the camera's viewfinder with what the finished image will look like. The DMC-FZ18 has a beautiful, big LCD viewfinder and a little electronic viewfinder that you can use when it's too bright to use the LCD. In addition, you can set the camera to give you a quick review of each picture after you shoot it. Watch this review carefully as it sometimes will differ from what you see in the viewfinder. This can be hint that one of the camera's settings is incorrect. Don't ignore it.

The next step is to learn to recognize tricky scenes like the one above and to make the decision about which part of the picture needs to be correctly exposed. You may have to set the camera for spot metering or, if the camera has an exposure-lock button, just move the camera around until you see the exposure you want and then press the exposure-lock button. (Before trying this on the FZ18, go to the camera's setup menu and set the exposure-lock so that it only locks the exposure, but not the focus as well.)

Then experiment. With both the camera and with your computer's software. Take lots of pictures in different lighting conditions. Unlike the old days of film, it's all free, and the feedback is instantaneous.

So what's the message about Raw vs JPEG? Simply that with the newer cameras, you don't always need to shoot in Raw format to get great results. Many beginners on seeing the Raw option are given the impression that this is the only way to get good results. Not true. For most people, shooting in JPEG is more than enough. I use it. Shooting Raw is for people who've pushed the results in JPEG as far as they can and are willing to spend the extra effort in working with Raw to get that little bit extra.
<< Previous  Oct 4, 2007  Next >>
Copyright 1958-2008 Tony & Marilyn Karp
Our Art Museum
Web Site Design
Systems Design
The Future
About
About Tony Karp   -  
Recent Entries
Noiseography -- A new photographic technique
Shooting infrared with the Panasonic DMC-FZ28
You're never too young
One month with the Panasonic DMC-FZ28
A trip to Berryville - Panasonic DMC-FZ28
It's the Hobbitt's birthday
On September 11th
Shooting Tri-X with the Panasonic DMC-FZ28
A shot in the dark - Panasonic DMC-FZ28
Sunset and the far-up lens -- Panasonic DMC-FZ18
Further musings on the Panasonic DMC-FZ28
Customizing your camera for high-ISO photography
Panasonic DMC-FZ28 vs DMC-FZ18 at high ISO
Some musings about the Panasonic DMC-FZ28
Hummers, SUVs, DSLRs, and my DMC-FZ28
Panasonic DMC-FZ28 -- At the Flying Circus
Panasonic DMC-FZ28 -- The journey begins
Farewell, my Panasonic DMC-FZ18
More about the settings for the DMC-FZ18
Dealing with the modes and settings of the DMC-FZ18
Photography becomes art - Bird on a wire
The artist's muse at sunset -- DMC-FZ18
Do you need fancy equipment?
Now here's my plan
Good cookie, bad cookie
But seriously, folks...
Post-processing Mr. Squirrel
A museum of one's own
We need new words to describe what's happening
Going over to the dark side
Shooting the moon
Happy Anniversary, Hobbitt
The view from my window - DMC-FZ18
My favorite museum
A toast to the artist's muse
The DMC-FZ18, a sunset, and a glass of beer
Remembering Herbert Keppler
Shooting abstracts with the Panasonic DMC-FZ18
Fixing a Panasonic DMC-FZ18 problem
More pictures from my Panasonic DMC-FZ18
The journey of a thousand Melvins
Stairway to the stars -- Extreme post processing
DMC-FZ18 - Raw vs JPEG - The JPEG Manifesto
Chromatic aberration and the DMC-FZ18
Raw vs JPEG, the DMC-FZ18, and a mystery
Some pictures from my Kodak P880 - Part 2
Some pictures from my Panasonic DMC-FZ18
Some pictures from my Kodak P880 - Part 1
DMC-FZ18 - Don't be afraid of the dark
Shooting in "Medium" - DMC-FZ18 - The right exposure
Shooting in "Medium" and the Panasonic DMC-FZ18
In-use review -- Panasonic DMC-FZ18 - Part 2
In-use review -- Panasonic DMC-FZ18 - Part 1
Photography becomes art - Fantasy at Ida Lee
Photography becomes art - The chefs at Little Washington
My new old camera - the Kodak Easyshare P880
Photography becomes art - Variations on a theme
Doing the impossible - Part 4 - The final result
Doing the impossible - Part 3 - The solutions
Doing the impossible - Part 2 - The challenges
Doing the impossible - Part 1 - The Godfather
All the (art) news that's fit to print
The museum becomes art - #1
Photography becomes art - Making an angel
Some theories about the Sony DSC-H9
How to test a camera
Hitting the wall
Extreme post-processing - Working with infrared
Everything old is new again
Some further thoughts on the Sony DSC-H9
Farewell, my DSC-H9 - a mini review
Learning to live with the Sony DSC-H9
Possibilities
Some thoughts about cameras - The Sony DSC-H9
Blogging 2.0 - A new interface
A funny thing happened on my way to the blog
In the beginning...